Okay, friend, let’s have some real talk about Canva. If you’re running a business online, chances are you spend a significant amount of time creating graphics. Social media posts, freebies, slides, website updates- it adds up, right? And listen, I genuinely appreciate how Canva makes design feel possible for us non-designers, but let’s be honest – sometimes it feels like you blink and hours have gone by just nudging pixels around.
So, grab your coffee (or tea, whatever fuels you!) because I want to share some of my go-to Canva hacks that have truly helped me streamline my graphic design process. These aren’t just little Canva tips; these are the practical ways I claw back time so I can focus on the bigger picture stuff in my business (and maybe even log off a little earlier!). Ready to make designing feel less overwhelming and maybe even a bit more fun? Let’s get into it.
Game-Changing Canva Features You Need to Start Using Yesterday
Canva is a powerful tool to help you save time creating visual content. Here are some hacks to streamline your design productivity and help you work smarter, not harder.
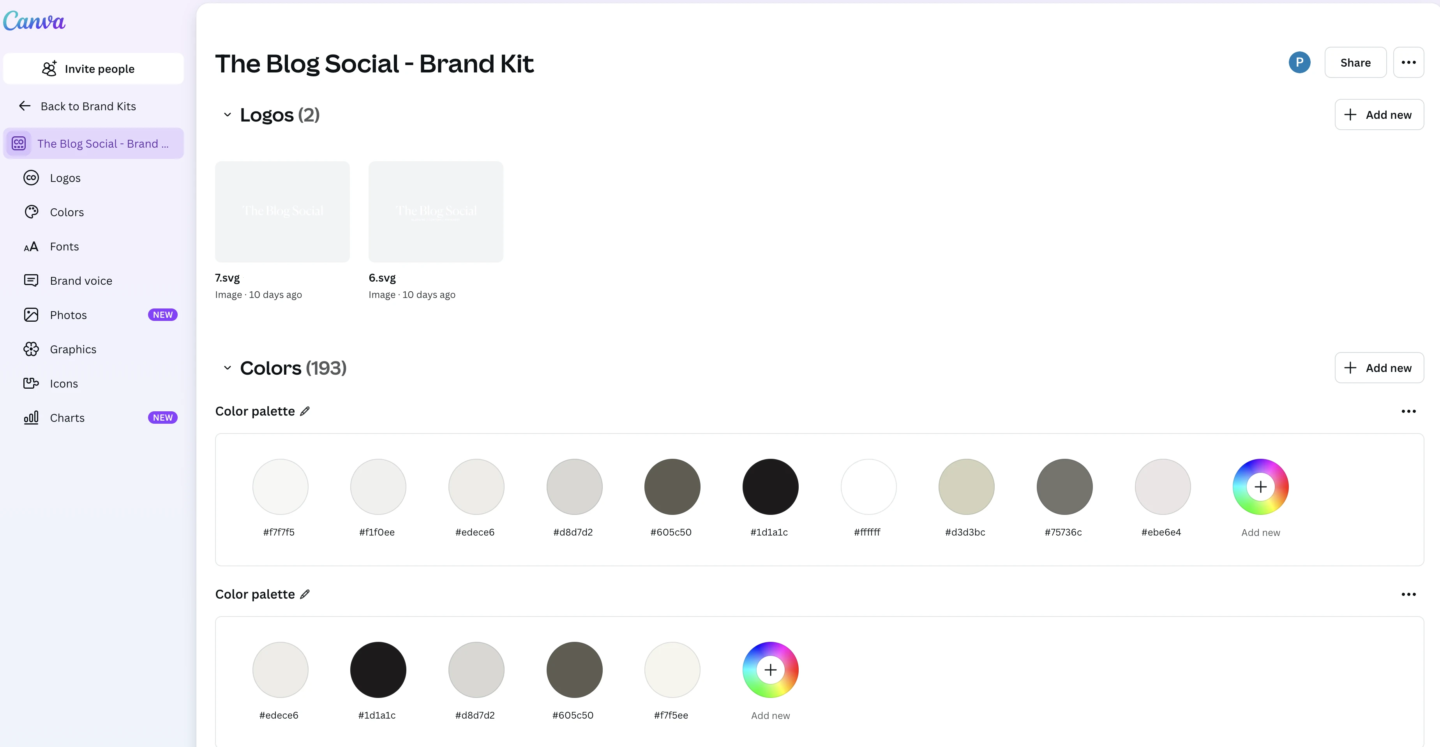
1. Your Brand’s Home Base: The Brand Kit
Okay, first things first. If you haven’t set up your Brand Kit, please do yourself a favor and do it today. Upload your logos, plug in your brand color codes, and select your go-to fonts. This isn’t just about looking cohesive (though it definitely helps!), It’s about pure speed. No more digging for hex codes or endlessly scrolling for the right font. It’s all there, waiting for you in every design. It’s a non-negotiable for efficient, consistent visuals.
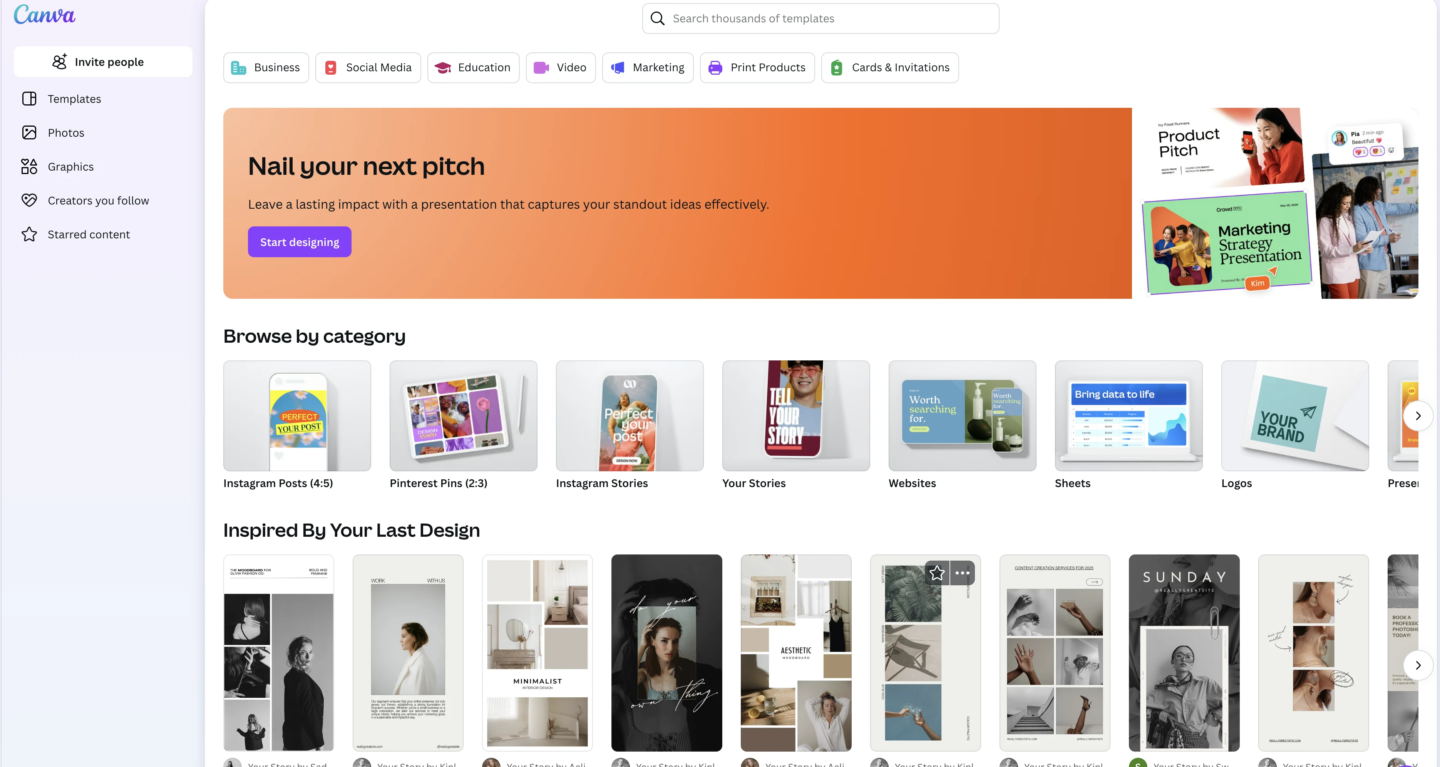
2. Lean on Templates (Wisely!)
Canva’s pre-made templates are such solid starting points. You don’t need to stare at a blank canvas every single time! Find a layout that resonates, apply your Brand Kit (see point #1!), and switch out the images and text on your own. Often, that’s enough to get a polished design quickly. They are also great for sparking Canva content ideas when your creativity feels a bit low.
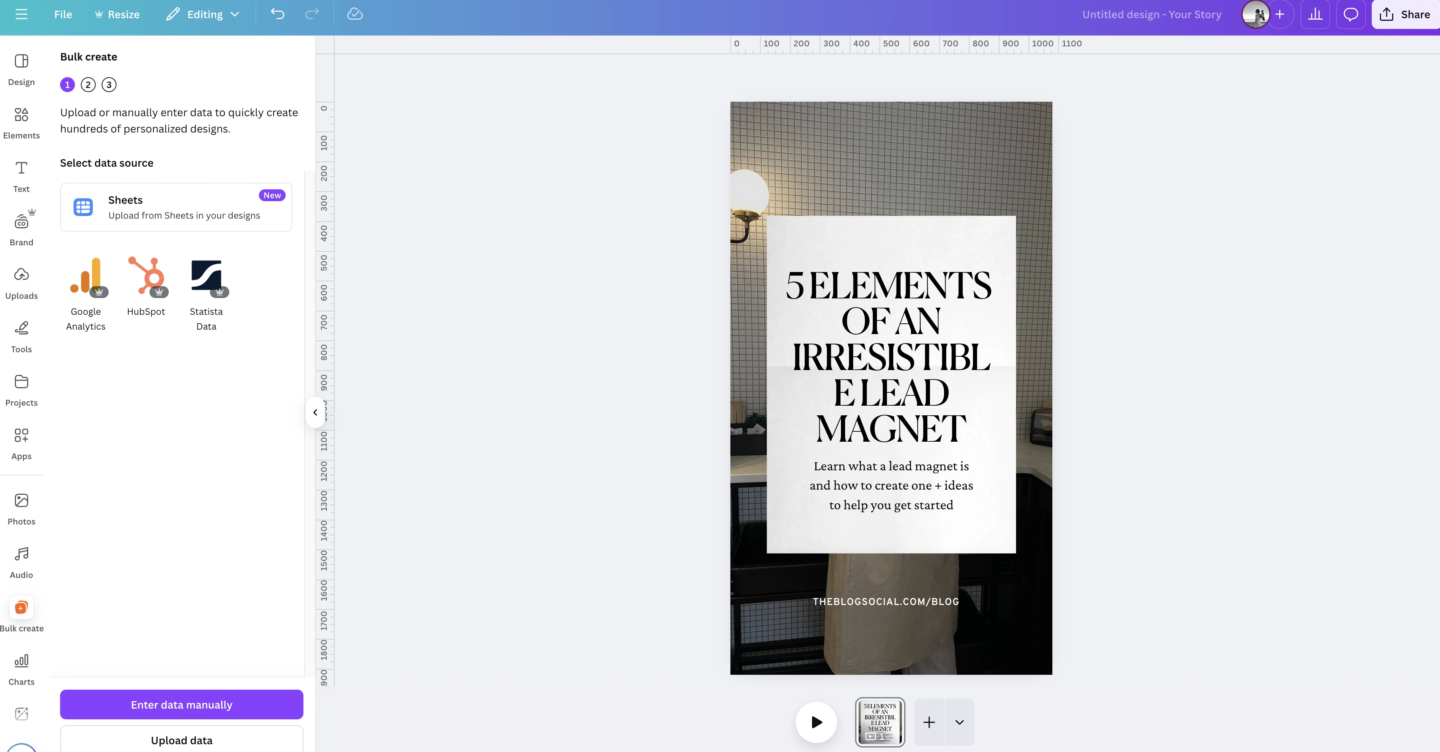
3. Create in Batches: Canva Bulk Create
All right, this feature is a serious game-changer, especially if you make lots of similar graphics like quotes, testimonials, or maybe sale announcements. You can set up your text variations in a simple spreadsheet (or even use Canva Sheets!), upload it, link it to the elements in your template, and let Canva generate multiple unique graphics almost instantly. It’s one of the best time-saving Canva tips out there.

4. One Design, Many Forms: Magic Switch
You know that feeling? You craft the perfect Instagram graphic, then realize you need versions for Facebook, Pinterest, maybe even an email banner. Ugh. Magic Switch is designed for this exact moment. With a few clicks, Canva will attempt to resize your design into various formats. It usually needs a little adjusting afterward, but it beats manually rebuilding everything and saves so much time. You can even use it to translate or turn a design into a different document type.

5. Create Folders for Your Go-To Elements
Find a graphic element, icon, or photo you know you’ll reach for again. Don’t rely on finding it in your ‘Recently Used’ list! Right-click it (or use the little menu) and add it to a dedicated folder. Maybe “Favorite Icons,” “Brand Lifestyle Photos,” “Call to Action Buttons” – whatever system works for you. Having this personal library easily accessible is huge.
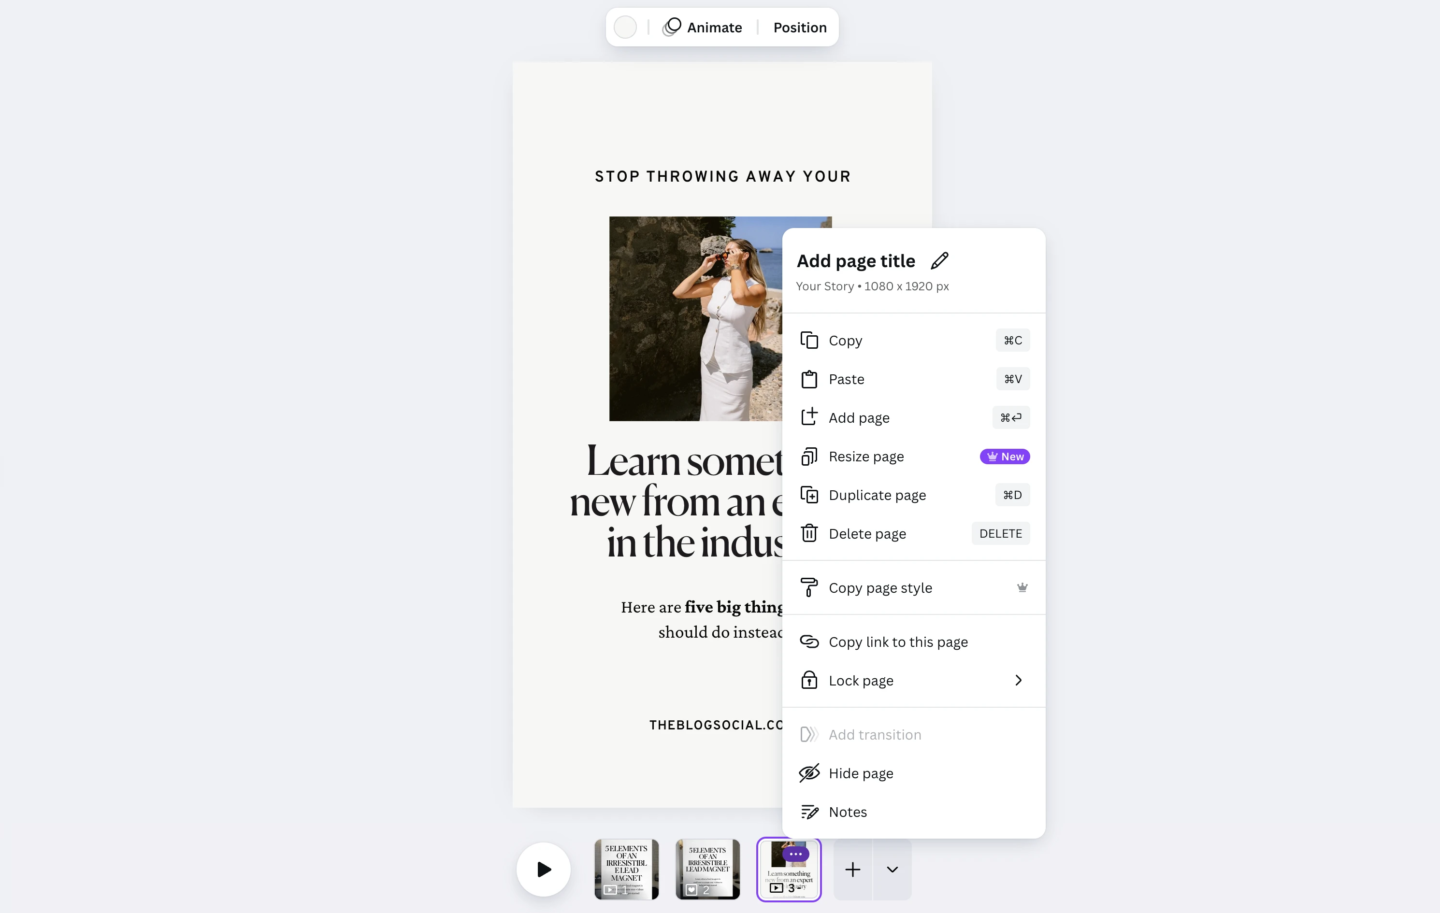
6. Copy & Paste (Between Designs!)
Did you know you can copy elements (Ctrl+C or Cmd+C) from one Canva design tab and paste them (Ctrl+V or Cmd+V) right into another? This is fantastic for reusing a complex text layout, a group of graphics you styled perfectly, or even just a button across different projects without starting over. It’s a simple but effective Canva design trick.

7. Duplicate Pages for Easy Variations
Need a slightly different version of a design? Instead of starting from scratch, just hit the “Duplicate Page” icon below the current page. Then, you can easily swap out the background, change the main text, or try a different call to action. Perfect for making variations for testing or different platforms.
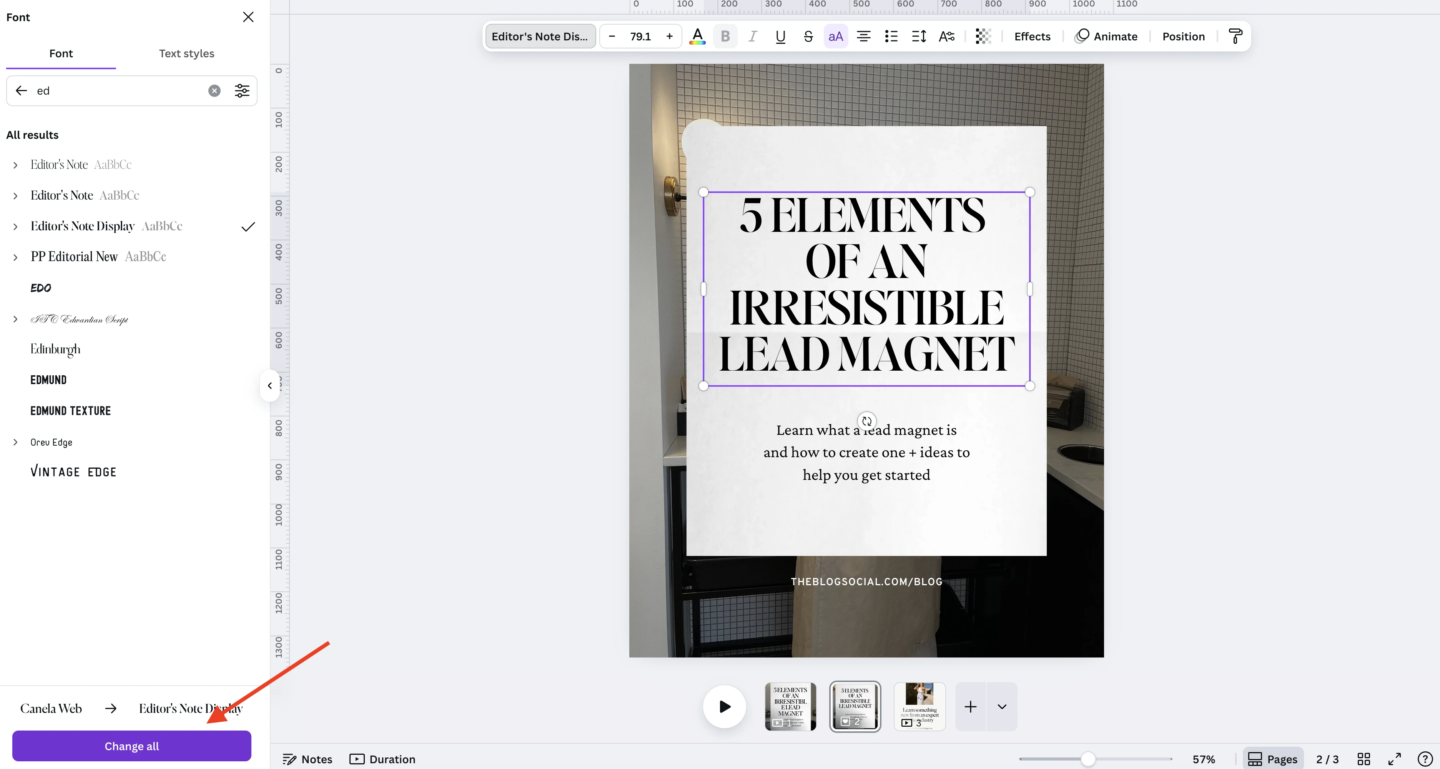
8. Quick Style Updates: Change All Colors & Fonts
Are you using a specific shade of blue throughout your design but now realize it needs to be your official brand blue? Or maybe that script font just isn’t working anymore? When you change the color or font of one element, keep an eye out for the “Change All” button that often appears at the bottom of the editing panel. One click can update every instance of your design’s original color or font. So helpful!

9. Remove Backgrounds in a Snap
Need to feature a product or person without a distracting background? The Background Remover tool (usually a Pro feature, but often worth the investment) is incredibly useful. One click usually does the trick, saving you tons of time compared to trying to outline something manually.
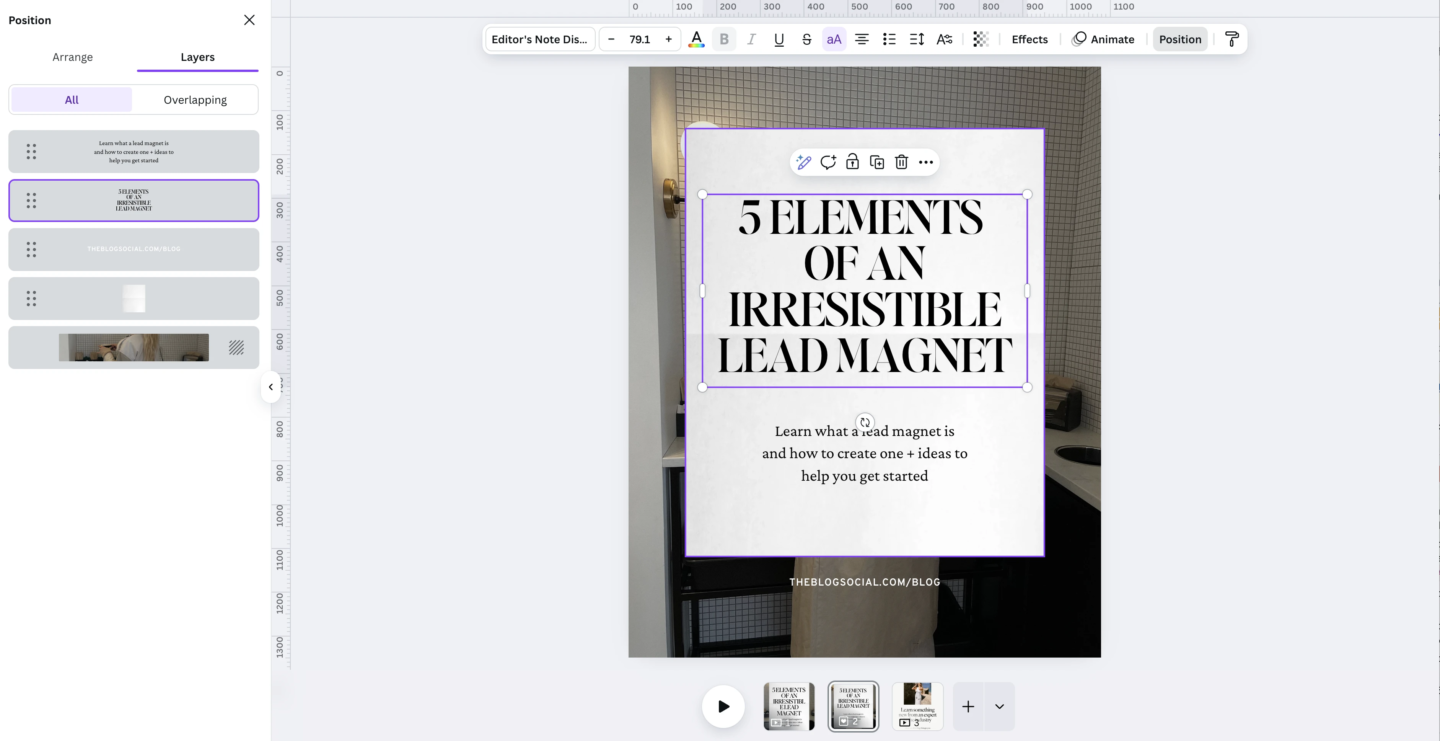
10. Get Control with Layers
Are elements overlapping strangely, or can you just not select that thing hiding behind something else? Get comfortable using the “Position” tab and checking the “Layers” panel. You can easily bring items forward, send them backward, and see a clear list of everything on your page. This gives you precise control and reduces frustration.
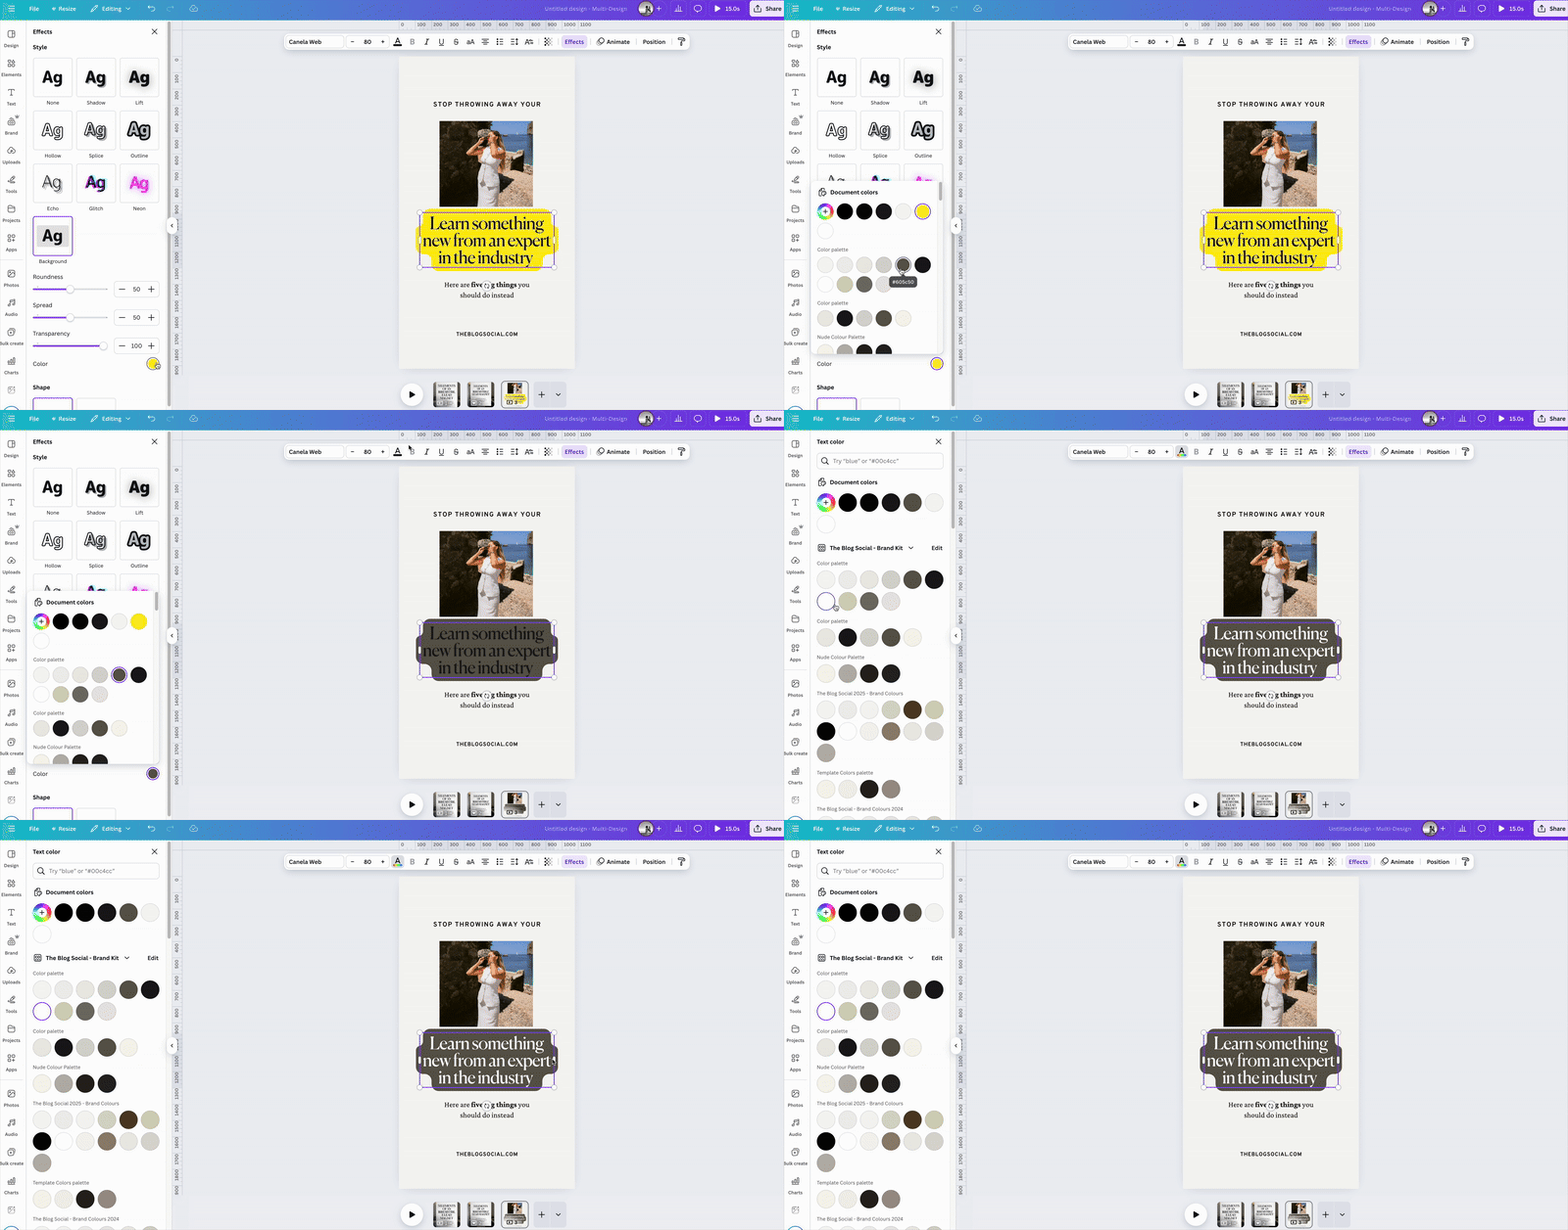
11. Improve Readability: Text Background
Want your headline or caption to stand out, even on a busy photo? Select your text box, head over to “Effects,” and choose “Background.” You can adjust the color, how see-through it is, and even round the corners. It’s a fast way to make sure your message is clear.

12. Line Things Up: Grids & Rulers
For getting that polished, professional look, alignment is key. Turn on rulers (Shift + R) and drag guides onto your page to help line things up. You can also find pre-made grids under “Elements” to structure your layout. Also, explore the Position tool (under ‘Position’ > ‘Arrange’) to perfectly align objects to the page or to each other (center, middle, top, etc.). These small design tips make a big difference.

13. Borrow Your Own Style: Copy Style Tool
Did you nail the perfect font, size, color, and effect combination on a piece of text or a shape? Select that element, simply click the little paintbrush icon (Copy Style) in the top toolbar, and then click on another element you want to change. Instantly, it applies the exact same styling. This is so useful for keeping things consistent without repetitive clicking.
14. Explore Canva AI Features
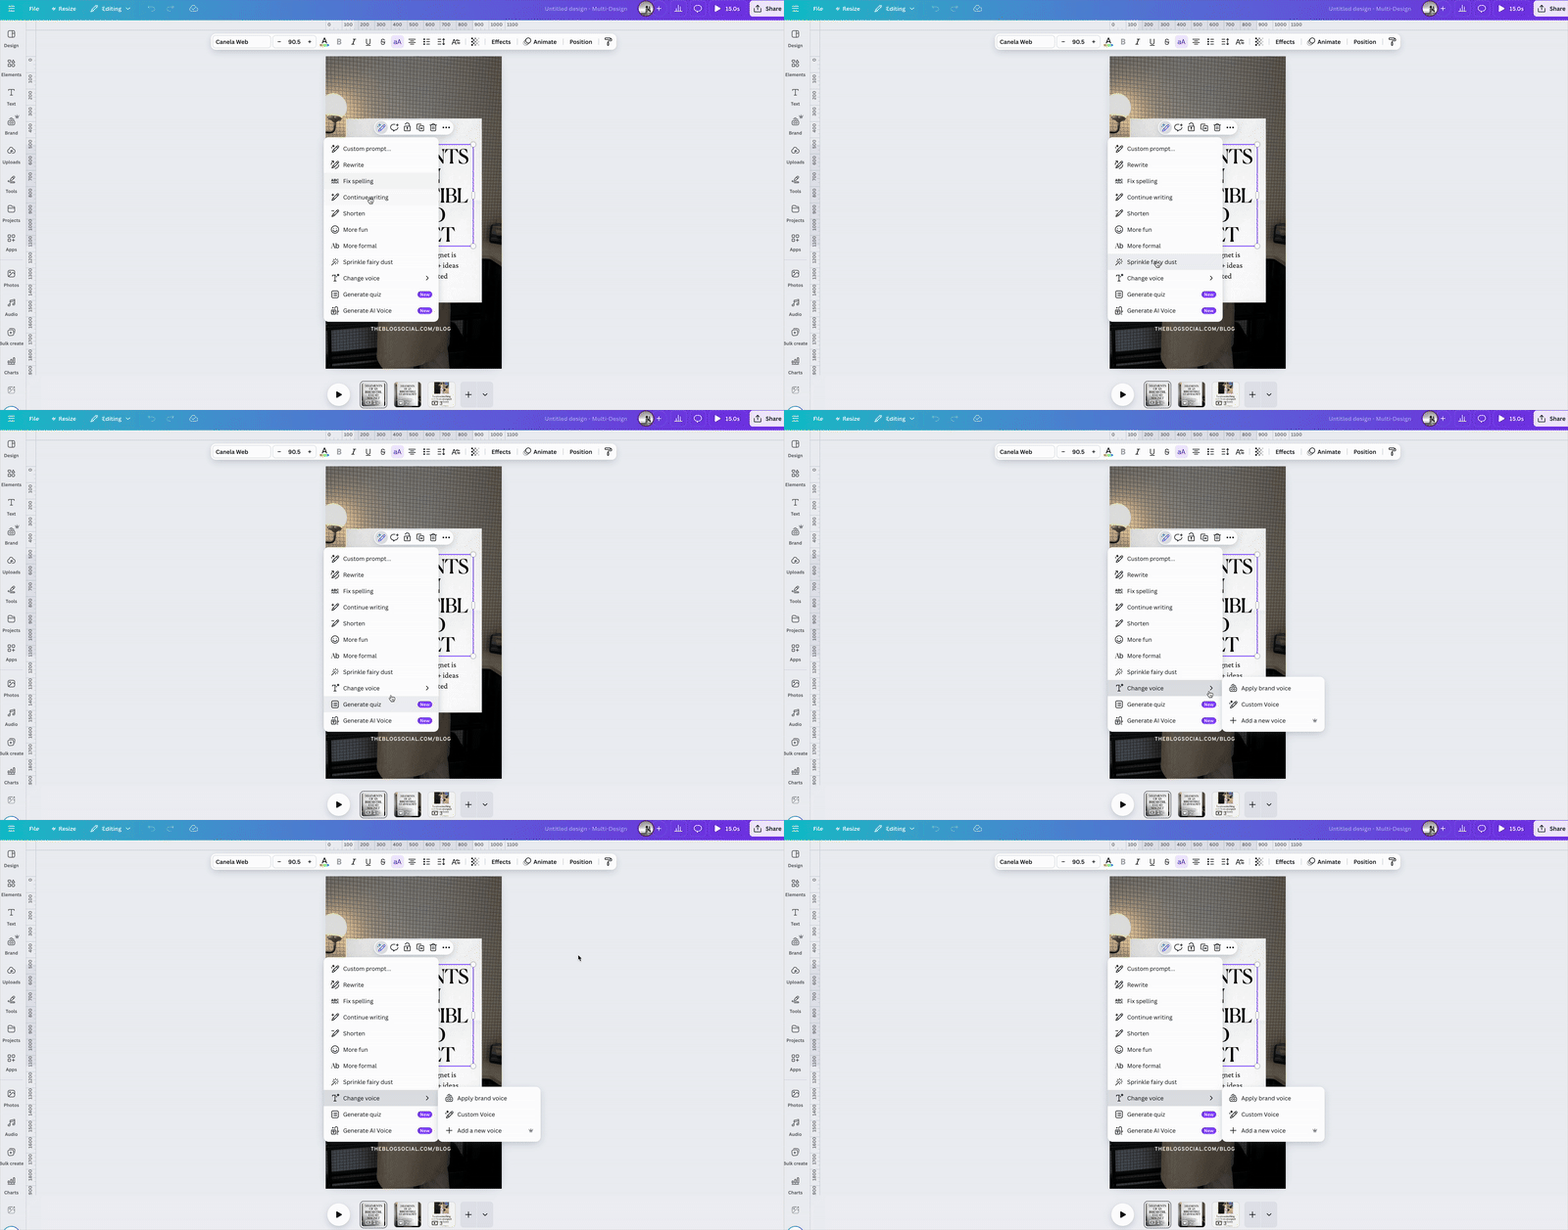
Canva is adding more AI tools all the time (like Magic Write for text help or Magic Edit for photos). It’s worth playing around with them! Need some quick copy ideas? Try Magic Write. Want to remove an unwanted object from a photo or even change something within it? Check out Magic Edit or Magic Grab. You can often point and click to edit any part of an image with ease. Think of it as a helpful little assistant.
15. Schedule Social Posts Directly
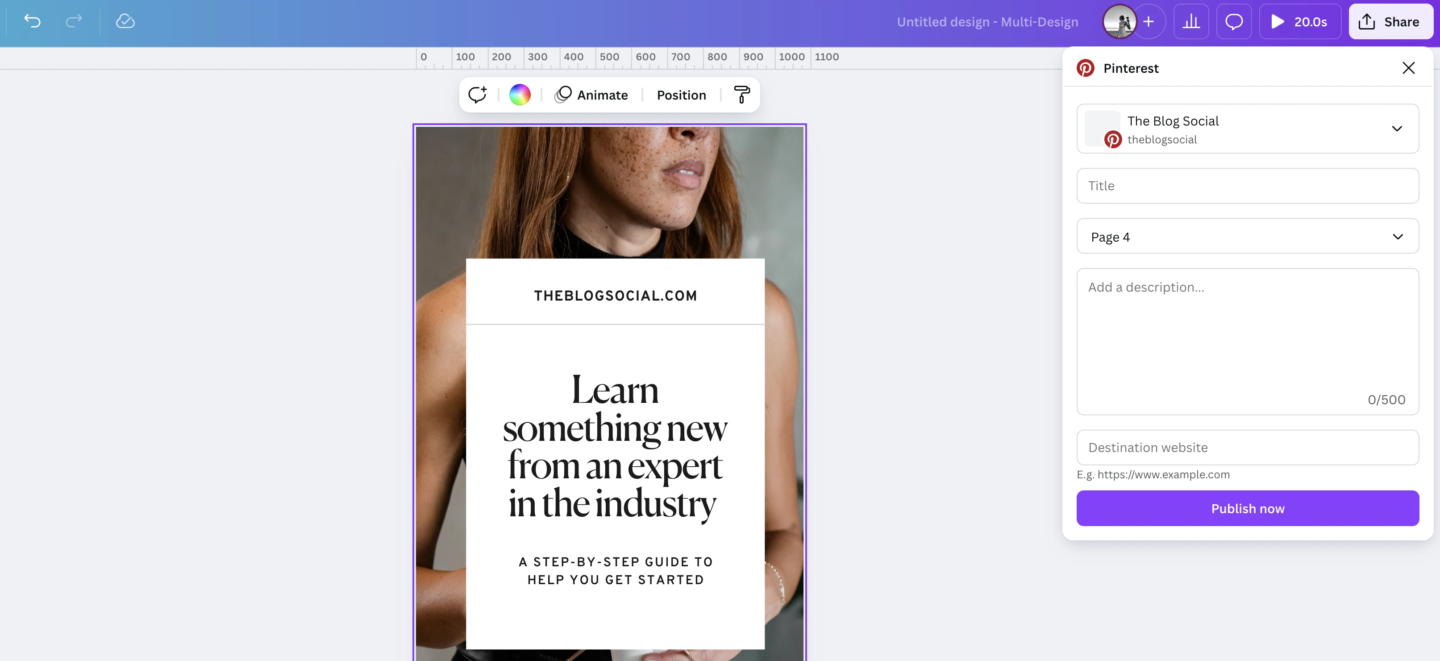
Finished your graphic and ready to share it? Instead of downloading and then logging into another tool to upload and schedule, see if you can connect your social media accounts directly to Canva. Often, you can schedule your posts right from the design editor, which really helps streamline your graphic design process to posting workflow.
16. Basic Photo Touch-Ups: Canva Photo Editing
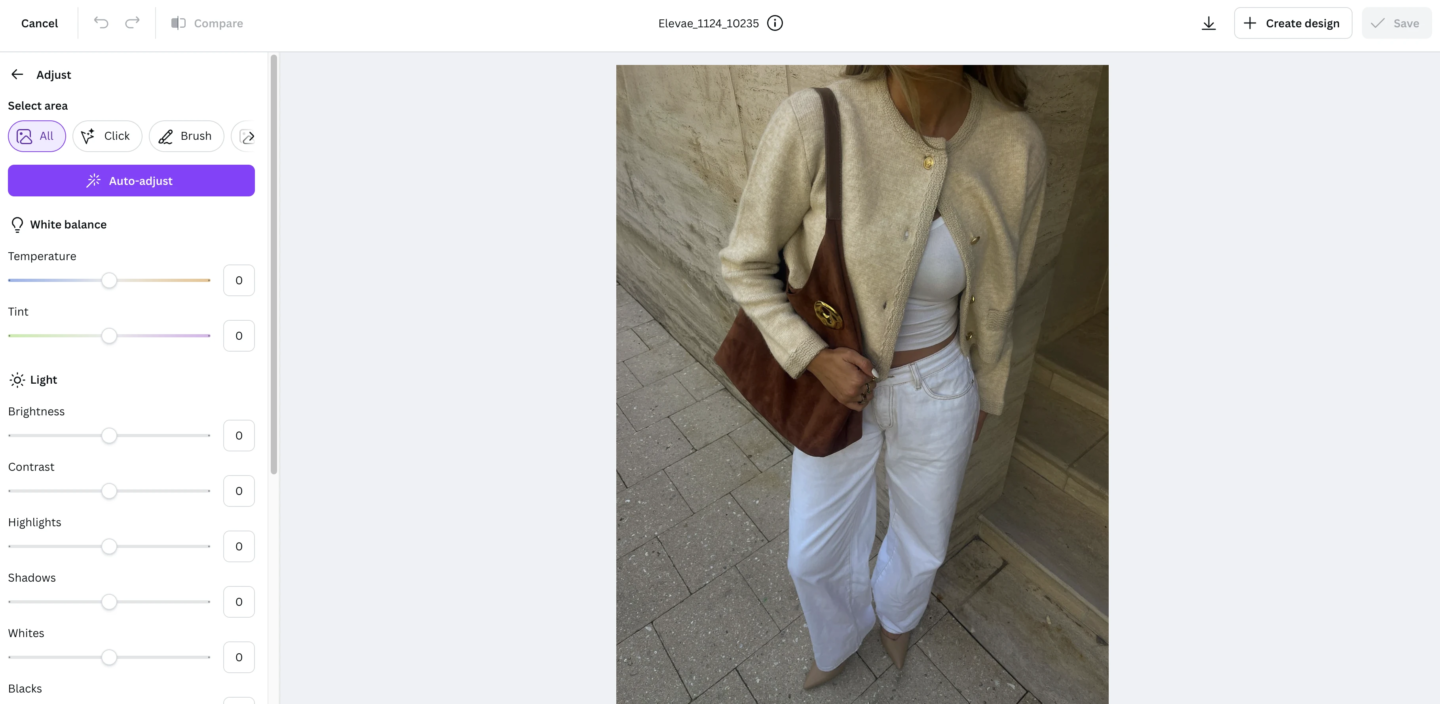
Don’t overlook Canva’s built-in photo editing options. You can easily adjust brightness, contrast, and saturation, apply filters, crop, and flip images. You can also refine and polish typography added to your images using the text tools and effects. For many basic adjustments, it saves you from needing separate photo software.

17. Plan Your Content with Canva Sheets
Did you know Canva has its own simple spreadsheet tool called Sheets? You could potentially map out your content calendar right inside Canva – listing post topics, caption drafts, and visual needs. You might even link directly to your designs or use it to power the Bulk Create feature (Hack #3!). It helps keep more of your workflow in one place.

18. Prevent Mistakes: Lock Elements
Finally got that logo or background image positioned exactly right? Protect it! Right-click the element or use the padlock icon in the toolbar to lock it. This prevents you from accidentally moving or resizing it while you’re working on other parts of the design. A true sanity saver!
Your Next Steps: Making These Hacks Work for YOU
Implementing even a few of these Canva hacks will revolutionize your design process. Start with the ones that address your biggest pain points, then gradually incorporate more as they become second nature.
Remember: The goal isn’t just creating beautiful designs—it’s creating them efficiently, working faster so you can focus on what truly matters in your business.
Which of these Canva hacks are you most excited to try? Drop a comment below – I’d love to know which one is about to change YOUR design game!







0 Comments